- See the seal recipe on a grid: 4 shards, 4 essences, 1 crystal.
- Pick the quest route or the luck route for each of the four Mysterious Shards.
- Decide whether to fight the Warden or dig in the desert for the Nether Crystal.
- Put the Act II bosses in order by level.
Soulrend v8.5.2 · Minecraft 1.20.1 Forge · last checked November 1, 2026
The goal: the Seal of the Underworld
In Soulrend, getting into the Nether takes a seal: you first craft the Seal of the Underworld (the reusable seal that opens the way to the Nether). Act II (called Act II - First Steps in the quest book) is the largest chapter in the pack with 85 quests, and nearly all of them feed this seal in some way. The chapter's intro text also says you have to finish the dependent quests in Act II to get the pieces.
The recipe in short
It is a shaped crafting table recipe: 4 Mysterious Shards + 4 Bottled Nether Essences + 1 Nether Crystal. None of the pack's files override the recipe, and the seal is not consumed when you use it.
Each shard's slot matches its name: 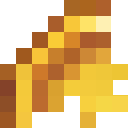 Top-Left goes top left,
 Top-Right top right,
 Bottom-Left bottom left and
 Bottom-Right bottom right. The four
 essences go on the edge middles and the
 crystal in the center; the result is a single
 Seal of the Underworld.
Warning: Same name, four different items
All four shards have the same in-game name: each one shows up as Mysterious Shard. You tell them apart by the quest book subtitles (Top-Left, Top-Right, Bottom-Left, Bottom-Right) and by their icons. Check the icons before you assume two identical-looking shards in a chest are a set.
The chain has five steps
- Bottles Collect 2 Crying Obsidian and craft Obsidian Infused Bottles; the quest wants 4.
- Essence With a bottle in your off-hand, kill any of nine undead mob types to collect 4 Bottled Nether Essences.
- Four shards For each shard, either finish the linked boss quests or rely on a mob or chest chance (at least 10%).
- Crystal Get the Nether Crystal from the Warden (50%) or from desert pyramid/desert well archaeology.
- Seal Place the nine ingredients in their slots and craft the seal: the quest completes and Act III opens. Using the seal by holding right-click for 5 seconds opens the way to the Nether.
Before you start: preparing for Act II
Act II opens once you finish the three-zombie quest in Act I (details: Prologue and Act I). The chapter's first quest, The Real Journey Begins, opens six branches at once when completed: Estus Flask, Dungeons and Combat, Ice and Fire, Crying Obsidian, Dungeon Crawl and Magical Eyes. The seal chain starts on the Crying Obsidian branch, but the other branches give you the gear and healing you need to finish it.
How mob and boss levels are set is explained on the Prologue and Act I page. Which Act II bosses have a fixed level and which scale with you is in this page's boss list.
- If you have no weapon The Don't Have Weapon Yet? quest (“Take one for free!”) lets you pick a free Steel weapon.
- Dungeon Crawl The quest text marks this structure as “recommended for new players!”. Make it your first dungeon.
- Make the bottles early Craft the bottles at the start of Act II and keep one in your off-hand, and essence piles up while you do everything else.
- Make travel easier The Prologue's Warp Stone and Waystone pay off on long trips (the Warp Stone has a 5-minute cooldown). The XP Tome quest in Act II protects your experience if you die a lot.
Estus and the Huge Estus Flask
The Estus Flask quest in Act II gives you 3  Estus Flasks. Each heals 25% of your maximum health and is your main healing tool in Act II. The
 Huge Estus Flask (Crimson Flask in the mod files) heals 75%.
- Where Estus comes from: boss quests reward between 1 and 5; Sunleia, Kamath and The GraveWatcher also drop 0 to 3.
- Huge Estus recipe: 2 Estus Flasks + 2 uncommon-rarity materials + 1 Blood Vial → 2 Huge Estus Flasks. Your flask count stays the same and each flask is worth three times as much; it is worth upgrading before the Warden and the level 40-60 bosses (inferred from the game files).
Step 1: Crying Obsidian and the Obsidian Infused Bottle
The chain begins with the Crying Obsidian quest. It asks for  2 Crying Obsidian. The next quest asks for
 4 Obsidian Infused Bottles. The bottle recipe is small: two Glass blocks and one Crying Obsidian.
The quest text does not say where to find Crying Obsidian. In vanilla Minecraft it is found at ruined portals in the Overworld; whether the pack keeps it that way is not known Unverified.
The recipe is two rows tall, so it fits in the top two or the bottom two rows of the crafting table. The two glass blocks share a row with a gap between them, and the Crying Obsidian goes right below that gap.
How much Crying Obsidian you need
One Crying Obsidian makes 3 bottles. Turning the 2 Crying Obsidian from the quest into bottles gives you 6, more than the 4 the bottle quest asks for. Item quests in this quest book do not take the items: after you complete the Crying Obsidian quest the two blocks stay in your inventory and you can turn them into bottles.
In the quest file the icon item is stored as a stack of 6, but the quest only needs 2. In this pack the number on an item quest's icon can mislead; the amount you need is the number in the task itself.
Step 2: four Bottled Nether Essences
The bottle does nothing on its own; you have to charge it. Hold an Obsidian Infused Bottle in your off-hand while you kill one of the mob types below and you get Bottled Nether Essence. The quest asks for 4 essences, and the seal recipe uses exactly 4.
The nine mobs that drop essence
This is the list in the pack's config file; no other mob counts:
- Zombie
- Skeleton
- Husk
- Zombie Villager
- Zombified Piglin
- Zoglin
- Stray
- Skeleton Horse
- Drowned
In the Overworld the easiest to find are the zombies and skeletons that spawn at night; husks in deserts, strays in snowy biomes and drowned in water count too. In Act I's three-zombie quest only the plain zombie counted; the essence list is wider, so do not skip these types.
Quest book correction: The quest book says: Kill “Zombies, Skeletons, and Spiders” for essence.
In practice: Spiders are not on the list. Only the nine types above count; killing spiders or cave spiders gives no essence.
While collecting essence
- The bottle must be in the off-hand; holding it in the main hand or the inventory does not work.
- Each kill uses 1 bottle and always gives 1 essence; the kill must be yours. A mob your teammate finishes gives you no essence.
- 4 bottles are enough for 4 essences; the two blocks from the Crying Obsidian quest make 6 bottles, so you have spares too.
- You will kill plenty of zombies and skeletons during the rest of Act II anyway. Put the bottle in your off-hand at the start of the chain and forget about it.
Two-handed weapons and the off-hand
The pack's “INERT” rule only removes dual-wield bonuses from the off-hand item when you use a two-handed weapon; the bottle stays and keeps collecting. You do not need to switch weapons.
Step 3: the four Mysterious Shards
The seal's four corners are four separate shards, and each has two routes. The quest route is certain: finish the linked quests and the shard is handed to you as a quest reward. The luck route is a 10% chance from a chest or at least 10% from a mob. 10% means one in ten tries on average, but nothing is guaranteed; twenty tries in a row can come up empty.
| Shard | Quest route (certain) | Luck route |
|---|---|---|
| Top-Left | Dread Citadel → Sapphire quest | abandoned mineshaft chest (10%) |
| Top-Right | the Frostmaw quest in the Fallen Myths chapter | Witch (at least 10%) |
| Bottom-Left | the Sunleia and Kamath quests (both) | Evoker (at least 10%) |
| Bottom-Right | any 2 of the Infernal Dragon, Sandworm and Yeti quests | pillager outpost chest (10%) |
Which route to choose
The two routes do not exclude each other; whichever comes first gives you the shard. If you want a plan:
- Quest route for Bottom-Left and Bottom-Right: both are tied to Act II bosses you will beat regardless.
- Try the luck route for Top-Left and Top-Right too: their quest routes go through the Dread Citadel and Frostmaw, another chapter's boss.
- For your first shard: both Bottom-Left bosses have a fixed level of 30.
- A shard found by luck counts too: the shard quest only wants to see it in your inventory.
This ordering was inferred from the level and dependency data in the files; the game does not force an order on you.
Top-Left Shard
Quest route: finishing the Dread Citadel quest opens a  Sapphire quest (untitled in the book, shown with the Sapphire icon; other text calls it “Ancient Sapphire”). Any Ice and Fire Sapphire works. The Top-Left Shard quest that opens next rewards the shard. The Dread Citadel quest's subtitle says “Prepare before visit...”, so do not go in unprepared.
Luck route: it appears in abandoned mineshaft chests with a 10% chance. The quest text adds “Yes, it is very rare.” for this route.
Top-Right Shard and Frostmaw
Quest route: the Frostmaw quest in the Fallen Myths chapter (subtitle “Slay the Terror of the Frosts”) tracks the Frostmaw kill advancement, and this shard is one of its rewards. You reach Fallen Myths through the Fallen Myth button in Act II. Frostmaw is a rare natural spawn in snowy biomes with a fixed level of 60.
Luck route: Witches drop it with at least a 10% chance.
Quest book correction: The quest book says: The Top-Right Shard is obtained by “defeating the Frostmaw”.
In practice: Frostmaw's drops do not include the shard; the shard is the reward of the Frostmaw quest in Fallen Myths. After the kill, open the chapter, complete the quest and claim the reward.
Bottom-Left Shard
Quest route: finish both the Sunleia and the Kamath quests; the Bottom-Left Shard quest only pays out when both dependencies are done. Sunleia lives in the Pantheon of Sunleia (desert), Kamath in the Ruins of Kamath, and both have a fixed level of 30.
Luck route: Evokers drop it with at least a 10% chance. The quest text also says the shard is guarded by the Illagers.
Bottom-Right Shard
Quest route: finishing any two of the Infernal Dragon, Sandworm and Yeti quests is enough. All three scale with your level; pick the two that suit you from the boss list.
Luck route: it appears in pillager outpost chests with a 10% chance.
Step 4: the Nether Crystal
The Nether Crystal in the center of the recipe (called “The Final Piece” in the quest book) comes from two sources:
- Warden: drops it with a 50% chance when killed.
- Desert archaeology: the loot of suspicious sand in desert pyramids and desert wells includes the crystal.
Quest book correction: The quest book says: The Nether Crystal drops from the Warden “(30% chance)”.
In practice: The rate the pack actually applies is 50%. The 30% in the quest is outdated text. The Warden's own loot table has no crystal; the pack's extra-drop config adds it.
Warden or digging?
The Warden lives in Ancient Cities (the Deep Dark); its level is fixed at 60 and never shown (boss list). On average, one Warden in two drops a crystal; coming away empty from one is normal.
Desert digging needs no fight, but the crystal is only one of several entries in the suspicious sand loot, and the files do not give its share as a single percentage. If you are not ready for the Warden, digging is a good thing to try while you wait.
Ocean ruins and trail ruins do not count
Some sources also list ocean ruins and trail ruins. Those files in the mod jar are not on the path the game reads; do not look for the crystal there.
The Warden also opens the Sky Arena side branch. The Warden no longer drops the  Heart of the Deep (the key to the Otherside dimension); that item is made with a separate recipe for Act III-b (see side branches).
The crystal unlocks 21 skill tree nodes
The Nether Crystal is not only a seal ingredient. 21 nodes in the passive skill tree (the core keystones and 6 Mage “Mind” nodes) require that you have picked up a Nether Crystal at least once. The condition is met the moment you collect it; using it in the seal later does not undo it.
Inferred from the game files
The requirement is your own “picked up” statistic. If another player picks the crystal up and hands it to you, it counts for them; dropping the item and picking it up yourself is enough.
Step 5: craft and use the seal
- Count the ingredients 4 different shards (the four corner icons), 4 essences, 1 crystal. Two copies of the same shard will not work.
- Fill the grid At a crafting table, put the shards in the corners, the essences on the edge middles and the crystal in the center.
- The quest completes The quest The Seal Of The Underworld (subtitle “You are worthy”) completes when it sees the seal in your inventory: the moment you craft the seal, the quest is done and Act III opens.
- Use it Hold the seal and keep right-click pressed for 5 seconds; the quest text calls this “eat the seal”. Using the seal opens the way to the Nether.
Quest book correction: The quest book says: The seal quest asks for the four shards and the Nether Crystal.
In practice: The recipe also needs 4 Bottled Nether Essences. The essence quest is completed separately, but the seal step does not remind you; do not spend your essences anywhere else.
The seal is not consumed
In the pack's config, consuming the seal on use is turned off (“Consume Seal” = false); after you use it, the seal stays in your inventory. Quests do not take items either, so after the shard and crystal quests you can craft the seal from the same items.
Playing as a group
- One seal is enough. The seal can be passed around. According to the wiki, each player has to use the seal themselves; one player using it does not open the Nether for the others. Hand it over in turn and let everyone hold right-click for 5 seconds.
- Essence and the crystal are personal. For essence the kill must be yours, and you have to pick up the crystal yourself (details). The damage budget also applies to the whole group together (boss list).
Act II bosses: the short list
Below are the Act II bosses that are tied to the seal or that you will meet along the way; here you only get “where, at what level, why it matters”. For loot and tactics, follow each name to its card in the boss catalog.
How to read the list
- Level is written in three ways across the series: fixed N (just “level N” in this list): the boss is always level N, independent of yours; at least N: the level never drops below N; if nearby players are higher, their level applies (up to 200); scales with you: the boss takes the level of the nearest players (the average of players within 60 blocks, 1–200).
- Damage budget: the budgeted bosses in Act II lose at most 20% of their maximum health per second; the whole group's damage shares that cap and the fight lasts at least 5 seconds. Definition and the list of 33 bosses: Combat and gear. A boss marked “no budget” has no such cap.
Bosses tied to the shard quests
- Infernal Dragon · Dragon Tower (mountain peaks, meadow) · scales with you · no budget. One of the three Bottom-Right bosses; the only source of Evil Eye, one of the End portal eyes (100%).
- Sandworm · Sandworm Nest (desert) · scales with you · 20% budget. One of the three Bottom-Right bosses; Sandworm Scale goes into the green path's T3 armor.
- Yeti · Yeti Hideout (snowy plains) · scales with you · no budget. One of the three Bottom-Right bosses; drops the End portal's Cold Eye with a 100% chance (igloo chests also have it at 70%).
- Sunleia · Pantheon of Sunleia (desert) · level 30 · 20% budget. Bottom-Left together with Kamath; can be summoned again with a
 Blessed Beetle.
- Kamath · Ruins of Kamath (dark forest, plains, forest, snowy taiga) · level 30 · 20% budget. Bottom-Left together with Sunleia.
- Warden · Ancient City · level 60 (hidden) · 20% budget. Source of the Nether Crystal; opens Sky Arena.
- Frostmaw · snowy biomes, rare natural spawn · level 60 · 20% budget. A Fallen Myths boss; the Top-Right Shard is its quest's reward.
Other bosses along the way
- The GraveWatcher · Field of the Fallen · level 20 · 20% budget. The lowest fixed-level boss in Act II; a good candidate for your first boss attempt.
- The Dead King · Catacombs (underground) · level 40 · 20% budget. The Blood Staff and the Necronomicon do not drop from it: the pack strips both from mob drops; both are made with the pack's upgrade recipes (the Blood Staff from the Lich Staff).
- Enraged Dead King · summoned with a scroll · level 200 · 20% budget. The Dead King's optional second encounter; do not try it early in Act II.
- Ernos · Ernos Cave · scales with you · no budget. Its quest is marked “(optional)”.
- Ice and Fire hunts (only the Sea Serpent quest is marked “(optional)”; none has a damage budget): Hydra, Cyclops, Sea Serpent, Gorgon, Siren, Ghost. The Sea Serpent does not level; the others scale with you. Tactics are on the catalog cards.
Inferred from the game files
A sensible order based on the fixed levels: The GraveWatcher (20) → Sunleia and Kamath (30) → The Dead King (40) → Warden (60). Infernal Dragon, Sandworm and Yeti scale with you, so they fit anywhere in that order.
Act II loot feeds your armor path
The Rise of the Champion chapter's quest text colour-codes the armor paths: red Strength, green Agility, blue Wisdom, pink Dragon. In Act II, Dragon Bone is marked “T4 Armor (red path)” and Sandworm Scale “T3 Armor (green path)”. Factor this in when you pick two bosses for Bottom-Right: on Strength the Infernal Dragon does two jobs at once, on Agility the Sandworm does.
Structures and a suggested route
Act II's jobs are spread across the map. Boss lairs are listed in the boss list; these are the structures the quest texts add a warning for:
- Dread Citadel: “Prepare before visit...” The Top-Left Shard's quest route goes through here.
- Mausoleum: “Hard structure, will help you with dragon forge..”
- Graveyard: “Don't open the CHEST”. The quest text warns you plainly; leave the chest alone.
The order below was worked out from the bosses' fixed levels and the biomes their structures spawn in. It is not mandatory; the quest book does not force an order between these branches. If you pass a Witch, an Evoker, a pillager outpost or an abandoned mineshaft, try the luck route.
- Around your base With a bottle in your off-hand, hunt zombies and skeletons at night. If there is a Field of the Fallen nearby, The GraveWatcher at level 20 is a good first boss test.
- Desert trip Beat Sunleia (30) at the Pantheon of Sunleia and the Sandworm at the Sandworm Nest. On the same trip, dig the suspicious sand in desert pyramids and desert wells for a shot at the Nether Crystal; desert husks give essence too.
- Kamath Beat Kamath (30) at the Ruins of Kamath. If Sunleia is done too, the Bottom-Left Shard quest pays out.
- Snow trip Beat the Yeti at the Yeti Hideout; if you also beat the Sandworm, the Bottom-Right Shard is done. Look for Frostmaw in snowy biomes (Top-Right) and check igloo chests.
- Underground Beat The Dead King (40) in the Catacombs. Go into the Dread Citadel prepared and get the Top-Left Shard through the Sapphire quest.
- Ancient City Go for the Warden (60) last; if the desert digging came up empty, this is your main source (Nether Crystal). Then craft the seal.
Act II side branches
Act II has buttons that jump to other chapters (“Move to … Chapter”). None of them is required for the seal; the only one that becomes required is Fallen Myths, through the Top-Right Shard's quest route.
- The Otherside: the optional road to Act III-b (Deeper and Darker). The portal needs the Heart of the Deep and the quest text says “Heart is Craftable Now”.
- Fallen Myth: the Mowzie's Mobs bosses; the Frostmaw quest gives the Top-Right Shard.
- Soulslike Champions: the Soulslike Weaponry bosses.
- Aquamirae: the Mother of the Maze and Ghost of Captain Cornelia bosses.
- Sky Arena: opens after the Warden.
- Journey To The End / Magical Eyes: the End portal's Legendary Eye quests; Act IV is far off, but you can collect the eyes from Act II onward. The Infernal Dragon and the Yeti give two of them (boss list).
- Dragonslayer: the branch tied to Infernal Dragon's Dragon Bone.
- Magic Equipment: the “If you are mage, look this!” button in The Forgotten Sands; for spellcasters.
The Heart of the Deep is crafted: Sapphire + 2 Dark Iron Blocks + Warden Tendril + Withered Demon Heart. According to the wiki, the Withered Demon Heart comes from The Decaying King boss in the Nether, so in practice this side branch happens during Act III (inferred from the game files). Act III-b is optional and unlocks nothing in the main story; details on the End portal page.
Quest book correction: The quest book says: The buttons read “Move to Dungeons and Combat Chapter ->” and “Move to Soulslike Weaponry Chapter ->”.
In practice: The buttons' target does not exist in the pack; clicking them opens nothing. No step of the seal chain depends on these buttons.
If you are stuck
- Essence is not dropping: check that the bottle is an Obsidian Infused Bottle, that it is in your off-hand and that the mob is one of the nine types (essence).
- Frostmaw dropped no shard: that is expected; the shard is a quest reward (Top-Right).
- The Warden dropped no crystal: the chance is 50%; try desert digging too (Nether Crystal).
- A “Move to” button goes nowhere: see side branches.
The seal recipe does not show up
Every ingredient has a fixed place, and two copies of the same shard break the recipe: all four Mysterious Shards share a name but are different items. Use the icons to put each shard in its own corner (recipe). Use a crafting table; the 2×2 grid in your inventory is too small.
I have the shard but the quest will not complete
The quest book is linear: a quest will not complete until the earlier quests it depends on are done. Open the shard quest's links in the quest book and see which earlier quest is missing. Keep the shard in your inventory; the quest will see it once it unlocks.
Act II checklist
Tick off the steps of the seal chain here. Marks are stored only in this browser and share the same record as the series checklist on the Getting started page; a step you tick on one page shows as ticked on the other.
Act II - First Steps
- The seal is not consumed; you can hand it to a teammate.
Next step: Act III and the Nether
Crafting the seal completes the quest and opens Act III - Into The Flames; using the seal opens the way to the Nether. Act III brings Nether structures, the Wither, the eight Cataclysm bosses (Eight Sins) and the End portal eyes. Picking up the Knight Sword dropped by the Underworld Knight unlocks 54 more skill tree nodes; think of it as the follow-up to the Nether Crystal's 21.
Loot changes in the Nether too: in the pack's Apotheosis config, affix and gem rarity depend on the dimension, and the Nether line lists a higher range than the Overworld. Which tiers it actually unlocks has not been tested in game Unverified; details on the End portal page.
- Next: Act III: Eight Sins and the End portal
- Full cards for the bosses on this page: Boss catalog
- If you want to go back: Prologue and Act I · Getting started and the checklist
If something looks different in your game, let us know through the contact page; this guide was written for version v8.5.2 of the pack.
Frequently asked questions
How do you unlock the Nether in Soulrend?
You have to craft and use the Seal of the Underworld. It is made from 4 Mysterious Shards, 4 Bottled Nether Essences and 1 Nether Crystal. Crafting the seal completes the quest and opens Act III; using it by holding right-click for 5 seconds opens the way to the Nether.
Which mobs drop Bottled Nether Essence?
Nine types that you kill while holding an Obsidian Infused Bottle in your off-hand: zombie, skeleton, husk, zombie villager, zombified piglin, zoglin, stray, skeleton horse and drowned. Each kill uses 1 bottle and always gives 1 essence. The quest text mentions spiders, but spiders do not count.
Can I collect essence with a two-handed weapon?
Yes. The pack's “INERT” rule only removes dual-wield bonuses from the off-hand item when you use a two-handed weapon; the bottle stays and keeps collecting.
Where does the Top-Right Shard come from?
It is the reward of the Frostmaw quest in the Fallen Myths chapter; it is not in Frostmaw's own loot. Alternatively, Witches drop it with at least a 10% chance.
What is the Nether Crystal drop chance from the Warden?
50%. The quest book says 30%, but that text is outdated. The crystal also comes from suspicious sand in desert pyramids and desert wells.
Do I have to beat all three bosses for the Bottom-Right Shard?
No. Any two of the Infernal Dragon, Sandworm and Yeti quests are enough. You can also find it in pillager outpost chests with a 10% chance.
Which boss should I beat first in Act II?
The GraveWatcher, with a fixed level of 20, is the lowest fixed-level boss in Act II and lives in the Field of the Fallen. Next come Sunleia and Kamath at level 30; together they give the Bottom-Left Shard.
Is the seal used up when I use it?
No, the pack turns off seal consumption; it stays in your inventory after use and you can hand it to a teammate. According to the wiki, every player has to use the seal themselves.
This guide is unofficial and is not affiliated with the makers of the Soulrend v8.5.2 pack. The content was prepared by inspecting the files of the installed pack (Minecraft 1.20.1 · Forge). Minecraft © Mojang Studios; this page is not approved by or associated with Mojang Studios or Microsoft. The Soulrend pack belongs to Apotheotic_Studios; the mods and images in it belong to their respective authors; names are trademarks of their respective owners. Credits: credits.json. Textures used on this page: dungeons and combat (Tohirogosu, MCreator), Nether Remastered (Jmods), Minecraft (Mojang Studios), Deeper and Darker (Kyanite Team), iceandfire. If you are a rights holder and want an image removed, tell us through the contact page and it will be taken down.
More of our guides
Soulrend Modpack Guide: How to Start
Getting started in Soulrend: a Prologue-to-Act V roadmap, your first race and class pick, keybinds, quest book rules and 10 traps that can cost you time (v8.5.2).
Soulrend Boss Order and Boss Catalog (65 Bosses)
All 65 Soulrend bosses on one page: location, summoning, level, damage budget and loot. Boss order by Act, filters by Act or mod, and a Defeated mark.